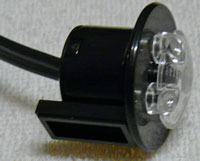
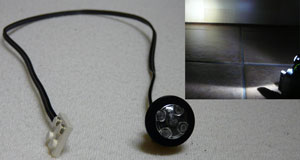
| Bauanleitung |
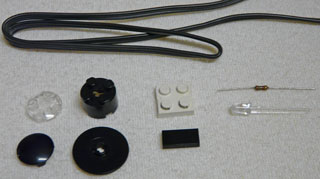 |
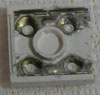
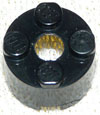
- 1x Electric Plate, 2x4 with contacts
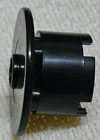
- 1x Brick, 2x2 Round - schwarz
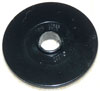
- 1x Plate, Round 2x2 with Rounded Bottom (Boat Stud) - schwarz
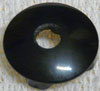
- 1x Technic, Disk 3x3 - schwarz
- 1x Tile 1x2 with Groove - schwarz
- 1x Plate, Round 2x2 with Rounded Bottom (Boat Stud) - transparent clear
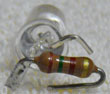
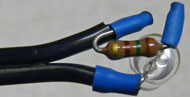
- 2- Adriges Kabel
- 1x 150Ω Widerstand
- 1x super LED, Ø=5mm
- Schrumpfschlauch
|
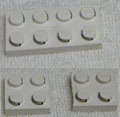 |
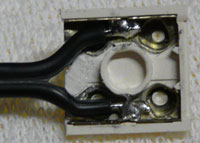
- Electric Plate auseinandersägen
|
 |
 |
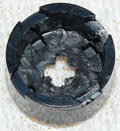
- Brick, 2x2 Round - schwarz:
Noppen innen wegfräsen
- Electric Plate:
Noppen außen wegfräsen
|
 |
 |
 |
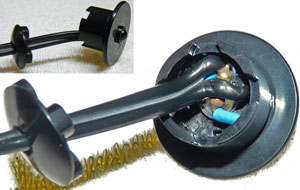
- Brick, 2x2 Round:
Loch Ø=5mm (LED)
- Technic, Disk 3 x 3:
Loch Ø=5mm (LED)
- Plate, Round 2 x 2 with Rounded Bottom:
Loch Ø=4mm (Kabeldurchführung)
|
 |
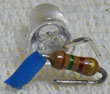 |
- 150Ω Widerstand (hier: an langem Bein) anlöten
|
 |
|
 |
- Brick, 2x2 Round und Technic, Disk 3x3 mit Sekundenkleber verkleben
|
 |
|
 |
- Tile 1x2 with Groove mit Sekundenkleber festkleben
- restliche Teile zusammenstecken
|
 |
|
 |
|
